Airball™
Grabber™ Safety
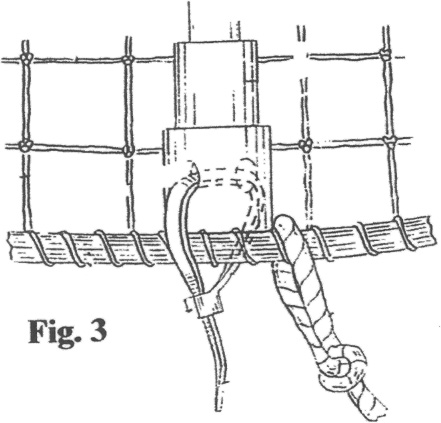
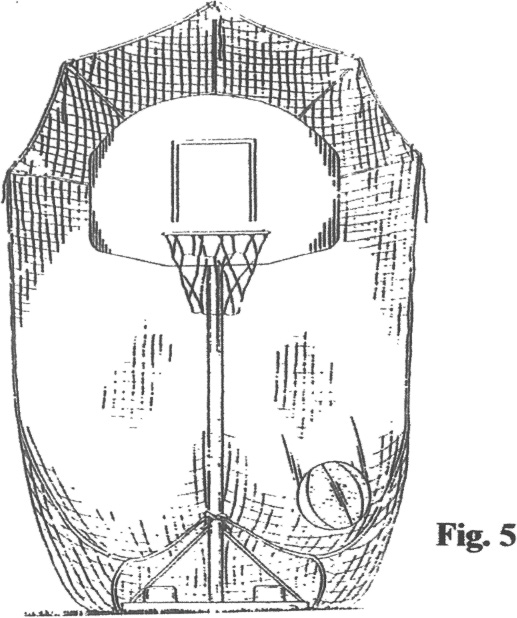
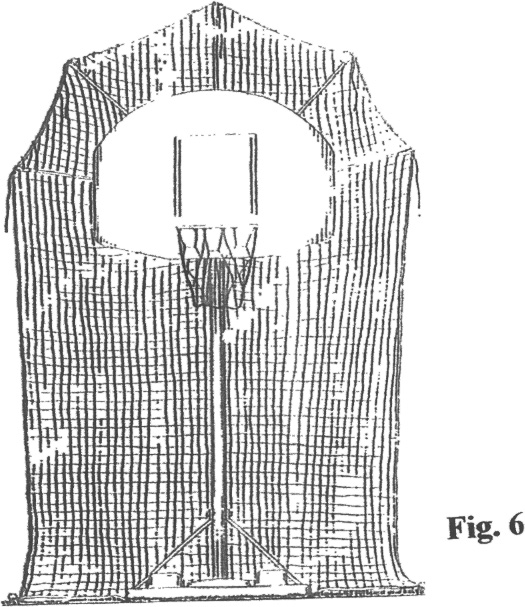
Net 1) After unpacking kit, find and unroll net on a large flat surface. (i.e. driveway or garage floor) 2) Find mounting bracket assembly (one piece with five threaded holes in it). 3) Find and insert five rods into mounting bracket assembly, by hand tightening in a clockwise direction. (Figure 1) 4) After inserting rods, turn rod-side down on spread net, with the ends of the five rods lined up to the colored leads tied on the net. Please exercise cautions and avoid nearby persons (EYE DANGER). 5) Find plastic wire ties and insert one end through the pair of holes at the end of each rod. (Figure 2) 6) Secure the net to the rod ends by wrapping the wire tie around the poly rope at the same position as the white lead string. Pull the wire ties snug. (Figure 3) 7) Attach the two stainless steel hose clamps to the highest possible position on your Basketball pole support. (Centered at least eight feet from the ground.) Do not fully tighten the clamps. (For 5 inch or larger square posts, request alternate installation materials. You will need to use two self-tapping screws. These are to be used to install the mounting block. Use the holes in the mounting block as a guide to pre-drill at the designated 8 ft height, on the back of your pole. After the pre-drilling is complete mount the bock to the pole with the self-tapping screws (for fit). Remove the mounting block, follow directions to secure rods and net to the mounting block and re-install the mounting assembly at location of pre-drilled holes.) 8) Assistant will now hand up the complete net assembly for you to insert the bottom portion of the bracket into the lower of the hose clamps, after which you will adjust the upper of the two clamps over the top portion of the mounting bracket. Tighten both clamps while holding the net assembly in place. (Figure 4) 9) Secure the bottom of the net in either of the following ways.
10) Retain shipping container for future storage use. Enjoy playing safely. 11) For disassembly follow the directions in reverse order. Wire ties can be cut for removal, please dispose of in a safe manner. SPECIAL NOTE: All SAFETY REQUIREMENTS OF EQUIPMENT MANUFACTURERS MUST BE COMPLIED WITH. INSTALLATION OF THE AIRBALL™ GRABBER™ IS SUBJECT TO SET-UP INSTRUCTIONS AND SAFETY CAUTIONS SPECIFIED BY BASKETBALL SYSTEM SUPPLIERS. NO WARRANTY IS IMPLIED BY AIRBALL CONCEPTS INCORPORATED, IF THE MANUFACTURER'S WARRANTIES FOR PROPER SET-UP OF THE BASKETBALL SYSTEM ARE VOIDED BY INSTALLATION OF THE AIRBALL™ GRABBER™, IF THE MANUFACTURER SPECIFICALLY PROHIBITS THE ADDITION OF SUCH A SYSTEM TO THEIR EQUIPMENT. AIRBALL CONCEPTS INC. WARRANTS COMPONENTS, FOR ONE YEAR FROM DATE OF PURCHASE, FOR DEFECTS IN MATERIALS, ONLY. (DATED PROOF OF PURCHASE REQUIRED.) Components Net
(one) Thank
you for choosing Airball Concepts, Inc. quality products.
Please direct customer inquiries to Copyright 2003-2014 - Airball Concepts, Inc. - Privacy Policy |